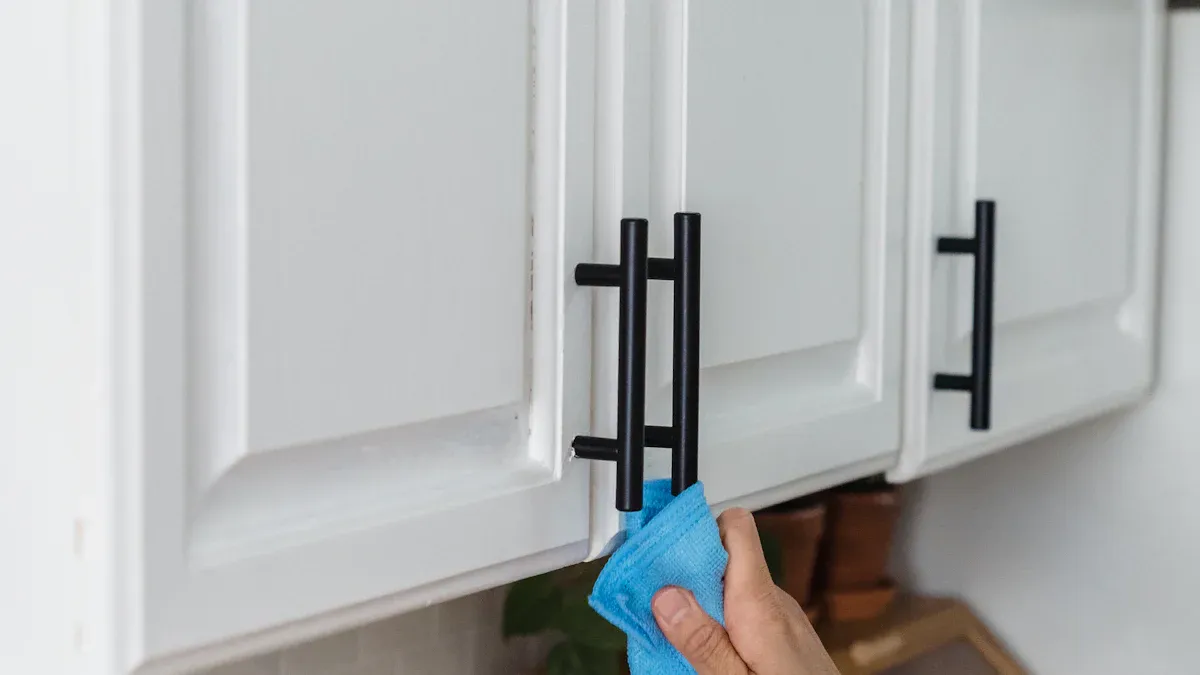
Homeowners can refresh their home’s aesthetic with new cabinet hardware. A simple update to Furniture Knob And Handle offers a professional finish. Real estate agents often highlight the significant impact of such changes. For instance, soft-close hardware provides an estimated 100% return on investment. This minimal investment immediately conveys a sense of quality in a modern kitchen. New cabinet pulls and knobs instantly update any space at a low cost, adding a premium touch that buyers notice and value.
Key Takeaways
- New cabinet hardware updates your home’s look. It adds value at a low cost.
- Choose hardware that matches your style. Consider modern, traditional, or rustic designs.
- Measure carefully for new hardware. This ensures a good fit and straight lines.
- Use the right tools for installation. A drill, template, and screwdriver are important.
- Drill pilot holes to prevent wood damage. This makes screws go in smoothly.
- Tighten hardware firmly but gently. Do not overtighten to protect cabinets.
- Practice on scrap wood first. This builds confidence and avoids mistakes.
Why Upgrade Your Cabinet Furniture Knob And Handle?
Upgrading cabinet hardware offers a significant impact on a home’s overall appearance and perceived value. This simple change provides both immediate aesthetic benefits and long-term financial advantages.
Instant Style Transformation
New hardware instantly revitalizes a space. It acts as the “jewelry” for cabinetry, defining the room’s character.
How new hardware updates a space
New hardware dramatically updates a space. Different styles create distinct atmospheres. Modern minimalist designs feature clean lines and matte finishes. They often use edge pulls or finger pulls in matte black, brushed nickel, or satin brass. For a farmhouse or rustic feel, homeowners select cup pulls, distressed metal finishes, and ceramic knobs. These typically come in oil-rubbed bronze, antique brass, or wrought iron. Classic traditional spaces benefit from ornate designs, crystal or glass knobs, and beaded detailing. Polished nickel, aged brass, or pewter often define these choices. Transitional styles blend old and new with simple yet decorative pulls and knobs, frequently in brushed nickel or champagne bronze. Industrial and urban aesthetics utilize pipe-like pulls, exposed screws, and utilitarian shapes in matte black, gunmetal, or raw iron.
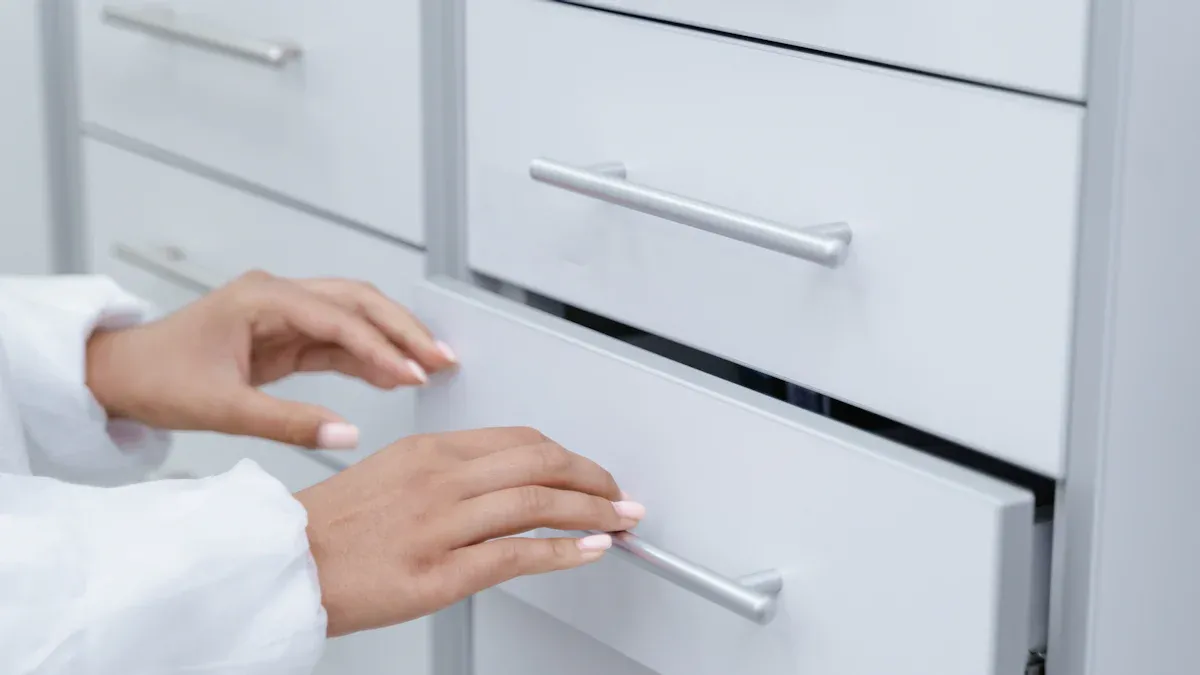
Hardware choices also include knobs and pulls. Knobs are smaller and simpler, ideal for cabinet doors. They come in various shapes and install with a single screw. Pulls, or handles, are larger. They suit drawers and heavier cabinet doors, providing a more substantial grip. Styles include bar, arch, and cup designs. Finishes also play a crucial role. Polished chrome offers a sleek, reflective look. Matte black provides a dramatic, modern aesthetic and hides fingerprints effectively. Brushed brass or gold delivers a warm, inviting, and timeless feel. Antique brass imparts a traditional, vintage flair. Brushed nickel is a subtle, versatile option complementing many styles.
Budget-friendly renovation impact
Updating cabinet hardware represents a highly budget-friendly renovation. It offers a fresh, updated look without the expense or disruption of a full remodel. This cost-effective improvement significantly enhances a room’s aesthetic appeal.
Personal Expression and Value
Hardware upgrades allow homeowners to express their unique taste while simultaneously boosting their property’s market appeal.
Reflecting unique taste
Homeowners use cabinet hardware to reflect their unique taste. The wide array of materials, finishes, and styles allows for personalized touches. Whether someone prefers the sleekness of modern designs or the warmth of rustic elements, hardware provides an avenue for individual expression. This personalization makes a house feel more like a home.
Enhancing home value
New cabinet hardware significantly enhances home value. It brings a cohesive, updated look aligning with modern design trends. Real estate experts confirm that small changes make a big impact on a home’s value and appeal. Tim M. Clarke, a real estate team founder, states, “Updating hardware falls squarely into this category. For a fraction of the cost of a full renovation, you can give your home a fresh, updated look that buyers will notice and appreciate.”
Kitchens and bathrooms with updated hardware feel more approachable to buyers. They require less imagination from potential purchasers. When paired with other cosmetic updates, such as new lighting or backsplashes, new hardware elevates the entire room. This differentiates a home in a competitive housing market. It gives the property a polished, well-cared-for feel. The right Furniture Knob And Handle acts like jewelry for cabinetry, tying the whole room together.
Choosing the Right Furniture Knob And Handle for 2025 Trends
Selecting the appropriate hardware significantly influences a room’s overall design. Homeowners consider current trends, material durability, and ergonomic comfort when making choices.
Trending Materials and Finishes
Materials and finishes define the character of cabinet hardware. The year 2025 highlights specific preferences in this area.
Brass and matte black options
Brass and matte black remain highly popular choices. Matte finishes and mixed metals are strong trends for 2025 Furniture Knobs. These options offer a sophisticated and contemporary look. Rose gold knobs also present a premium, warm, and heavily trending option in 2025 interior themes.
Brushed nickel and ceramic choices
Brushed nickel continues its reign as a versatile and widely favored finish. It complements various design aesthetics. Other popular finishes for contemporary cabinet hardware include:
- Stainless steel
- Chrome
- Black matte metal
- Clear cast acrylic Ceramic choices also provide a classic or eclectic touch, adding texture and color.
Wood and mixed material designs
A growing trend in luxury home design involves mixed materials in cabinet hardware. Designers combine textures like matte and shiny, or metal with leather, wood, or glass for a unique appearance. High-end options include rich Italian leather inlaid in a solid bronze frame, part of the Designer Leather Collection. Hand-applied bronze finishes develop a harmonious patina over time, adding character.
Popular Styles and Aesthetics
Hardware styles evolve, reflecting broader design movements. Homeowners choose styles that align with their desired aesthetic.
Modern and minimalist looks
Modern and minimalist styles emphasize simplicity and clean lines. These designs feature simple, linear shapes, allowing cabinetry architecture to take center stage. Edge pulls, linear bars, or recessed handles work best for modern overlay or frameless slab cabinets, maintaining clean lines. Matte black hardware and satin finishes create a sleek, subtle, and functional look. Modern cabinet pulls are simple, often used on lower cabinets. Bar pulls are popular, slender, and not distracting. Modern cabinet knobs, popular for upper cabinets, feature simple, elegant construction. They are small, simple, and perfect for minimalist designs. Geometric shapes can offer a bolder look. Barely-there recessed pulls, such as nickel recessed finger pulls, provide streamlined and luxurious results. The “less is more” approach suggests installing pulls only where necessary to keep modern kitchens free from visual clutter.
Traditional and transitional designs
Traditional designs often feature ornate details and classic shapes. They frequently use polished nickel, aged brass, or pewter. Transitional styles blend traditional and modern elements, offering a balanced and enduring aesthetic. These designs often incorporate simple yet decorative pulls and knobs.
Rustic and industrial touches
Rustic and industrial styles embrace raw materials and utilitarian forms. Homeowners select cup pulls, distressed metal finishes, and ceramic knobs for a farmhouse or rustic feel. Industrial aesthetics utilize pipe-like pulls, exposed screws, and utilitarian shapes in matte black, gunmetal, or raw iron.
Functionality and Ergonomics of Furniture Knob And Handle
Beyond aesthetics, functionality and ergonomics are crucial for daily comfort and ease of use.
Comfort in daily use
Comfort in daily use is paramount. Homeowners test grip, feel, and ease of use by physically interacting with samples. They simulate daily use, testing hardware with wet or greasy hands and different grip strengths. Pulls are generally more ergonomic for heavy or frequently accessed drawers and cabinets. Strategic mixing by function involves using pulls on frequently used drawers and heavy cabinet doors, and knobs on lighter upper cabinets and decorative storage. This prioritizes comfort where it is most needed.
Ease of grip and operation
Ease of grip and operation depends on several factors. Pull projection, center-to-center spacing, and edge profiles significantly influence grip quality and wrist posture. D-shaped pulls offer an easy grip for lower cabinets and drawers. Oversized knobs provide improved leverage for upper cabinets. Long bar pulls offer multiple grip points for tall pantry doors. Knurled surfaces provide extra friction, useful near sinks where hands might be wet. Soft radius edges contribute to added comfort. The tactile sensation of opening drawers and doors is a vital detail. Soft-close hinges with uniform damping and full-extension undermount slides enhance the overall experience.
Accurate Measurement Guide for Furniture Knob And Handle
Precise measurements ensure a professional and aesthetically pleasing installation of new hardware. Homeowners must understand the specific requirements for different hardware types.
Center-to-center for pulls
Center-to-center measurement refers to the distance between the centers of the two mounting holes on a pull. This measurement is critical for proper fit and alignment. To determine this, one measures the distance between the centers of the two mounting holes on a handle. Matching the new hardware’s center-to-center measurement with existing holes or the intended installation location ensures correct alignment. Common center-to-center sizes include 3 inches (76 mm), 3.75 inches (96 mm), 4 inches (102 mm), and 5 inches (128 mm).
For small drawers, approximately 12 inches by 5 inches, a singular 3-inch, 5-inch, or 12-inch pull works well. Narrower drawers, under 12 inches, might benefit from a T-pull handle. Standard drawers, ranging from 12 to 36 inches, can use one or two 3-inch or 4-inch pulls, or 96mm and 128mm options. Oversize drawers, 36 inches or larger, often require longer pulls like 6-inch, 8-inch, 10-inch, or 12-inch options. Alternatively, two smaller pulls, such as two 3-inch or two 5-inch pulls, can be used.
For a clean look, homeowners maintain consistency by using the same length pull for all drawers in an area, even if drawer heights vary. When uncertain, choosing a longer pull is often advisable. Longer pulls are typically heavier-duty, suitable for larger or heavier drawers, and offer a more polished aesthetic. A popular option involves using one pull size across all cabinetry, recommending pulls with at least a 3-3/4 inch center-to-center measurement for comfortable grip and appearance. Pulls between 5 and 6.5 inches offer an updated look and fit most drawers. For wide drawers, a single longer pull provides a cleaner, more contemporary look and easier operation than two smaller pulls. A good rule of thumb suggests using a pull approximately one-third the length of the drawer, sizing up if between sizes. For upper cabinet doors, pulls between 5 and 7 inches are generally safe, with larger sizes suiting a more contemporary style. Extra-long pulls are ideal for extra-tall cabinets like pantries. Appliance pulls are larger-scale, designed for paneled appliances, and feature larger bolts for increased force.
Single-hole for knobs
Knobs typically require only a single hole for installation. For paneled doors, homeowners align the installation hole with the edge of the rail. For elongated knobs, they align the top of the knob with the rail. On slab doors, they place the hole equidistant from the bottom and side of the cabinet, usually 2 inches. For pulls on slab doors, the end of the pull should occupy this position. For paneled drawers, centering the hardware within the panel is usually the most aesthetic choice. For heavy vertical pullouts, such as trash cans, installing hardware within the top rail is recommended for easier access. On slab drawers, homeowners center the hardware for shallow drawers and place it near the top for deeper drawers. For modern cabinetry, placing all knobs or pulls towards the top creates a sleek look.
Matching existing holes
When replacing hardware, matching existing holes simplifies the process significantly. For pulls, homeowners measure the center-to-center distance of the old hardware and purchase new pulls with the exact same measurement. This avoids drilling new holes and ensures a seamless swap. If the new hardware has a different center-to-center measurement, or if homeowners install new hardware on cabinets without existing holes, they must carefully mark and drill new holes. Using a cabinet hardware template ensures consistency and accuracy across multiple installations. This prevents misaligned hardware and maintains a uniform appearance throughout the kitchen or bathroom.
Essential Tools for Installing Your Furniture Knob And Handle
Successful installation of new cabinet hardware requires the correct tools. Having these essential items ensures precision, efficiency, and a professional finish. Proper preparation with the right equipment prevents errors and protects cabinetry.
Drilling Equipment for New Holes
Drilling new holes accurately is a critical step. The right drilling equipment makes this process straightforward and prevents damage.
Drill and appropriate drill bits
A reliable drill is fundamental for creating new mounting holes. Homeowners can choose between corded or cordless models. Cordless drills offer greater mobility, while corded drills provide consistent power for extended use. Selecting the correct drill bit size is equally important. Wood-specific drill bits create cleaner holes in cabinet materials. The drill bit diameter must match the screw diameter for the new hardware. A slightly smaller bit than the screw’s threaded shaft ensures a snug fit without stripping the wood.
Pilot hole considerations
Drilling pilot holes prevents wood splintering and guides the screw accurately. A pilot hole is a small, shallow hole drilled before the main screw insertion. This initial hole reduces resistance, making screw insertion easier and preventing cracks in the cabinet material. The pilot hole’s diameter should be slightly smaller than the screw’s core, not including the threads. This allows the screw threads to grip the wood firmly.
Measuring and Marking Tools for Precision
Accurate measurements and clear markings are vital for consistent hardware placement. These tools ensure all knobs and pulls align perfectly.
Tape measure or ruler
A tape measure or ruler provides the foundation for precise placement. Homeowners use these tools to determine the exact location for each knob or pull. They measure distances from cabinet edges, corners, or existing holes. Consistent measurements across all cabinets ensure a uniform appearance.
Pencil or marker for accuracy
A pencil or fine-tip marker helps transfer measurements onto the cabinet surface. Clear, visible marks guide the drill bit, preventing misplacement. Homeowners should use a pencil that erases easily or a marker that does not bleed through the cabinet finish. Marking the exact center point for each hole ensures precise drilling.
Cabinet hardware template
A cabinet hardware template is an indispensable tool for achieving consistent results. This specialized jig simplifies the marking process for multiple installations. A high-quality template creates high-precision spacing for pull borings. It offers project flexibility, allowing adjustments to the setback from the edge up to four inches. Templates feature adjustable guides for accurate hole placement. They often include built-in measuring scales, both imperial and metric, for repeatable results and precise positioning. A movable edge guide facilitates easy and precise positioning. Durable hardened-steel drill guides ensure straight, accurate holes. Many templates use strong, lightweight polymer construction for easy handling and longevity. They also offer versatility for mounting single and multi-hole knobs and pulls. An adjustable end stop further ensures repeatable results across numerous cabinet doors and drawers.
Fastening and Alignment Tools
Once holes are drilled, fastening and alignment tools secure the hardware and ensure a polished look. These tools complete the installation process effectively.
Screwdriver (manual or electric)
A screwdriver secures the new Furniture Knob And Handle. Homeowners can use a manual screwdriver for careful tightening or an electric drill with a screwdriver bit for efficiency. Phillips head and flathead bits are common, depending on the hardware screws. When using an electric drill, setting a low torque prevents overtightening. Overtightening can strip screws or damage cabinet surfaces.
Level for straightness
A level ensures that pulls install perfectly straight. Homeowners place the level against the pull after initial attachment. They make minor adjustments before fully tightening the screws. This step guarantees horizontal or vertical alignment, contributing to a professional and aesthetically pleasing finish.
Painter’s tape for protection
Painter’s tape serves multiple protective purposes during installation. Applying tape over the drill area prevents wood splintering, especially on delicate finishes. It also protects the cabinet surface from accidental scratches or marks during drilling and hardware attachment. The tape removes cleanly without leaving residue, preserving the cabinet’s appearance.
Step-by-Step Installation of Your New Furniture Knob And Handle
Installing your new Furniture Knob And Handle requires careful attention to detail. Following a systematic approach ensures a professional and lasting result. This section guides homeowners through each crucial step, from initial preparation to drilling pilot holes.
Preparation Before Installation
Proper preparation sets the foundation for a successful installation. This involves removing old hardware and ensuring clean cabinet surfaces.
Removing old hardware
Homeowners begin by carefully removing existing hardware. They use a screwdriver to unscrew the old knobs or pulls from the cabinet doors and drawers. Keeping the old screws can be useful if they match the new hardware’s requirements. This step clears the way for the new installation.
Cleaning cabinet surfaces
After removing the old hardware, homeowners clean the cabinet surfaces. They use a mild cleaner and a soft cloth to wipe away any dirt, grime, or residue. A clean surface ensures accurate marking and prevents any debris from interfering with the new hardware’s fit. This preparation step also allows for a fresh start.
Marking Drill Points for Furniture Knob And Handle
Achieving consistent placement for new hardware requires precise marking. Homeowners utilize templates or careful measurement techniques to ensure accuracy.
Using a template for consistency
Homeowners can create a custom template using cardboard or thin wood. They cut a small notch or drill a hole at the desired measurement. Then, they position this template on each cabinet door or drawer and mark through the hole or notch. For corner or specialty cabinets, they modify or create separate templates to maintain visual consistency. Alternatively, homeowners invest in an adjustable cabinet hardware jig. These jigs, typically costing between $8 and $25, offer greater precision for marking and drilling holes. They choose the right templating guide, whether plastic or adjustable metal. For doors, they place hardware on the corner opposite the hinge. For drawers, they center it vertically and horizontally. They use the guide’s holes to mark the drill spot. This method ensures uniform placement across all cabinets.
Precise measurement techniques
Manual measurement also provides accuracy. Homeowners measure the width of the door’s side rail, including any detail, and divide by two to find the center. They repeat this process vertically. For pull-out drawers, they center the hardware exactly. For other cabinets, they decide on vertical placement; a standard is 3 inches up on upper doors and 3 inches down on base doors. They always double-check measurements before drilling. Using a level ensures marks are perfectly horizontal or vertical. This careful approach prevents drilling errors.
Drilling Pilot Holes for Secure Attachment
Drilling pilot holes correctly prevents damage and ensures a secure attachment. Homeowners follow specific tips for clean drilling and preventing wood splintering.
Tips for clean drilling
Homeowners use a drill bit appropriate for the hardware screws. They start with a smaller bit and gradually increase the size to prevent splintering. For woodworking, brad-point bits are recommended; they create clean, precise holes. Homeowners maintain steady pressure and keep the drill perpendicular to the surface. They wrap tape around the drill bit to mark the desired depth, avoiding drilling too deep into the cabinet.
Preventing wood splintering
Preventing wood splintering is crucial for a professional finish. Homeowners apply masking tape over the drill site before drilling. This tape helps hold the wood fibers together, reducing the risk of splintering. They avoid using a drill bit that is too small, as this can cause splitting. Harder woods specifically require larger pilot holes to prevent splitting. Drilling pilot holes helps prevent wood splitting, especially when working near edges or with hardwoods. Using a pilot hole that is too smallcan lead to difficulty driving the screw, potentially stripping the screw head or causing the wood to split. This careful attention to detail ensures a clean and secure installation of the new Furniture Knob And Handle.
Attaching Your New Furniture Knob And Handle
After drilling pilot holes, homeowners proceed to attach the new hardware. This step requires careful attention to secure each piece properly.
Securing knobs firmly
Homeowners secure knobs firmly to cabinet doors and drawers. They insert the screw from the inside of the cabinet or drawer, pushing it through the pilot hole. Next, they align the knob with the screw on the exterior surface. They then carefully turn the knob clockwise to engage the screw threads. Homeowners tighten the screw by hand or with a manual screwdriver. They avoid using power tools for this step to prevent overtightening. Overtightening can strip the screw threads or damage the cabinet surface. They ensure the knob feels snug and does not wobble.
Fastening pulls correctly
Fastening pulls correctly ensures stability and a straight appearance. Homeowners insert two screws from the inside of the cabinet or drawer, pushing them through the pre-drilled pilot holes. They align the pull with both screws on the exterior. Then, they carefully turn each screw clockwise to engage the threads with the pull. Homeowners tighten both screws evenly. This balanced tightening prevents the pull from appearing crooked or becoming loose over time. They check the pull for a secure fit and ensure it remains flush against the cabinet surface.
Final Adjustments for a Polished Look
Completing the installation involves making final adjustments. These steps ensure a polished appearance and long-lasting functionality for the new hardware.
Ensuring level alignment
Homeowners ensure level alignment for all pulls. They place a small level against each installed pull to check its horizontal or vertical position. If a pull appears slightly off, they loosen its screws slightly. They then gently adjust the pull until the level indicates perfect alignment. After achieving the correct position, they retighten the screws. For knobs, homeowners visually inspect them to ensure consistent placement and orientation across all cabinets. This attention to detail creates a professional and cohesive look throughout the space.
Tightening all hardware
After making all necessary alignment adjustments, homeowners tighten all hardware. They revisit each knob and pull, ensuring every screw is snug. They use a manual screwdriver for this final tightening. This prevents accidental overtightening, which can damage the cabinet material or strip the screw heads. Homeowners confirm that each Furniture Knob And Handle feels secure and does not wiggle. A final wipe-down with a soft cloth removes any fingerprints or marks from the installation process. This ensures the newly installed hardware shines, completing the refreshed look of the cabinetry.
Troubleshooting Common Issues with Furniture Knob And Handle Installation
Even with careful planning, installation challenges can arise. Homeowners can effectively address common issues with the right knowledge and tools. This section provides solutions for stripped screws, misaligned holes, and loose hardware.
Addressing Stripped Screws
Stripped screws present a common frustration during hardware installation. Understanding prevention and removal techniques helps maintain a smooth process.
Prevention methods
Over-tightening screws is a common cause of stripped screw holes during cabinet hardware installation. Homeowners should apply gentle pressure when securing hardware. Incorrect use of electric tools also contributes to this problem. Operating drills at inappropriate rotational speeds or using drills without speed settings drives screws in too quickly. This can lead to stripped screw holes. Always use a manual screwdriver for the final tightening to prevent damage.
Removal and replacement solutions
Removing stripped screws requires specific techniques.
- Duct Tape: Place duct tape over the stripped screw. Apply firm pressure and turn counterclockwise. The tape fills gaps, improving screwdriver grip.
- Glue: Apply a small dab of super glue or Gorilla Glue to the screw head. Let it dry, then insert the screwdriver. The glue helps form a better grip with the screwdriver tip.
- Hot and Cold Temperatures: Heat the screw head with a hair dryer or heat gun. Immediately expose it to cold, such as ice. The expansion and contraction can loosen the screw, potentially making other methods more effective.
- Screw Extractor Kit: For stubborn screws, a specialized screw extractor kit from a hardware store provides the necessary tools for proper removal when household items are insufficient.
Fixing Misaligned Holes
Misaligned holes can compromise the aesthetic and functionality of new hardware. Homeowners can correct these errors with simple techniques.
Corrective techniques
Correcting minor misaligned holes involves a few steps. Homeowners first clean the area. They ensure the screw hole and surrounding surface are free of dust and grease for optimal filler adhesion. Next, they apply wood filler. They use a putty knife to firmly press wood filler into the hole, ensuring it is completely filled and flush with the cabinet surface. They allow the wood filler to dry thoroughly according to the manufacturer’s instructions. Then, they sand smooth the repaired area with fine-grit sandpaper until it is smooth and even with the cabinet. Finally, they match the finish. They apply paint or stain that matches the cabinet’s color to seamlessly blend the repair. For larger holes, wood dowels can provide a more robust repair.
Concealing minor errors
When reattaching hardware after repairing misaligned holes, homeowners consider using larger screws or incorporating washers. This helps to distribute the load more evenly and minimizes wear on the wood, ensuring a more secure and lasting fix. Matching the paint or stain to the cabinet’s original finish effectively conceals the repair.
Maintaining Loose Furniture Knob And Handle
Loose hardware detracts from a cabinet’s appearance and function. Regular maintenance prevents this issue.
Tightening strategies
Homeowners can use washers to take up slack when the door or drawer is not thick enough for the screw to tighten the knob flush. They choose washers with holes that accommodate the screw thread. They hold the knob with one hand and the screwdriver with the other to carefully loosen the knob counterclockwise. Once the screw is free, they thread one or two washers onto it to rest against the screw head. They insert the screw back through the door or drawer and hand-turn the knob until it is snug.
Long-term maintenance tips
Regular maintenance extends the life of cabinet hardware. Homeowners frequently dust to prevent dirt accumulation and preserve appearance. They avoid harmful chemicals, using wood-safe products or natural cleaning options to prevent damage. They handle hardware with care, avoiding tugging or twisting with wet or oily hands to maintain the wood’s finish. If the coating wears, they gently sand and apply a fresh layer of wood finish or varnish. They tighten loose screws regularly. They also check for alignment and handle wobble. Polishing wooden or brass handles monthly helps maintain their luster. Wiping with a microfiber cloth daily removes fingerprints and dust. A 50:50 vinegar-water spray can disinfect hardware once a week.
Pro Tips for a Flawless Furniture Knob And Handle Finish
Achieving a professional finish when installing cabinet hardware requires attention to detail and smart techniques. These pro tips help homeowners ensure precision, prevent damage, and build confidence throughout the installation process.
Utilizing Jigs and Templates for Consistency
Jigs and templates are indispensable tools for ensuring uniform hardware placement across all cabinets. They streamline the installation process significantly.
Achieving perfect consistency
Jigs and templates ensure perfect consistency in hardware placement. A Combination Square is useful for marking consistent measurements from cabinet edges. Homeowners set the desired measurement from the cabinet edge, mark the center, and transfer this setting to other cabinets for uniformity. Custom jigs, made from scrap wood, offer a budget-friendly and customizable solution. They involve attaching three pieces—one to the top, one to the side, and a centerpiece for drilling holes. This jig can be flipped for use on left or right doors and top or bottom cabinets. Store-bought jigs and templates, including adjustable jigs for various hardware sizes and cabinet styles, provide even greater precision. Basic plastic jigs offer multiple offset marking locations. Metal guide jigs provide a drilling template for accurate hole placement. True Position Tools, with 25 years of experience, are known for their refined designs that simplify and precision installation.
Speeding up the process
Using jigs and templates significantly speeds up the installation process. These tools eliminate the need for repeated individual measurements and markings. Homeowners can quickly replicate precise hole locations across numerous cabinet doors and drawers. This efficiency is particularly beneficial for larger projects with many hardware pieces. The consistent results also reduce the likelihood of errors, saving time on corrections.
Practice on Scrap Material for Confidence
Practicing on scrap material before drilling into actual cabinets is a wise strategy for any homeowner. This step builds essential skills and prevents costly mistakes.
Building confidence
Practicing on scrap material helps homeowners build confidence. They can experiment with drill bits, pressure, and marking techniques without fear of damaging their cabinets. This hands-on experience familiarizes them with the tools and the process. It ensures they feel prepared and capable when working on the actual furniture.
Avoiding mistakes on cabinets
Practicing on scrap material helps avoid mistakes on cabinets. Homeowners can refine their drilling technique, ensuring clean holes and preventing splintering. They can also test their marking methods for accuracy. This preventative measure saves time, money, and the frustration of repairing damaged cabinet surfaces.
Avoiding Overtightening Your Furniture Knob And Handle
Overtightening hardware is a common mistake with significant consequences. Homeowners must exercise caution when securing knobs and pulls.
Preventing damage to hardware
Overtightening can lead to stripped screws. It can also damage the hardware itself. Homeowners should avoid overtightening when securing handles to prevent these issues. Excessive force can strip the screws or compromise the integrity of the Furniture Knob And Handle. Proper installation involves ensuring handles are firmly tightened but without excessive force.
Protecting cabinet surfaces
Overtightening also protects cabinet surfaces. Excessive force from overtightening can damage the cabinet itself. This damage might include cracking the wood or stripping the screw holes, making future hardware replacements difficult. Homeowners should follow torque specifications and use a calibrated screwdriver to prevent compromising the integrity of the components. A manual screwdriver for the final turns helps prevent accidental overtightening.
Homeowners achieve a refreshed home aesthetic by upgrading cabinet hardware. They confidently install new knobs and pulls, transforming their spaces with ease. This process allows for modern, personalized touches throughout the kitchen or bathroom. These updates align homes with the latest 2025 design trends. A simple hardware change offers substantial aesthetic and functional improvements, enhancing overall home value. ✨
FAQ
What are the leading trends for furniture knobs and handles in 2025?
Leading trends for 2025 include matte black, brass, and rose gold finishes. Mixed materials, such as wood and metal combinations, also gain popularity. Modern, minimalist designs with clean lines remain highly favored.
How does one determine the correct pull size for a drawer?
One typically chooses a pull approximately one-third the drawer’s length. For instance, a 9-inch pull suits a 27-inch drawer. Longer pulls often provide a more contemporary aesthetic and easier operation.
Is it acceptable to combine knobs and pulls on cabinets?
Yes, combining knobs and pulls is a common practice. Many designers use knobs on cabinet doors and pulls on drawers. This approach offers both functional benefits and visual interest.
Which essential tools are necessary for installing new hardware?
Essential tools include a drill with appropriate bits, a tape measure, a pencil, and a cabinet hardware template. A screwdriver and a level also prove useful for precise installation.
How can one prevent wood splintering when drilling pilot holes?
To prevent splintering, apply painter’s tape over the drill site before drilling. Use a sharp drill bit and maintain steady pressure. Drilling pilot holes slightly smaller than the screw’s core also helps.
What should one do if existing screw holes do not align with new hardware?
If holes do not align, fill the old holes with wood filler. Allow it to dry, then sand smooth. Mark and drill new pilot holes for the new hardware. This ensures a clean, secure installation.
How often should one check and tighten loose furniture hardware?
One should regularly check and tighten loose hardware. A monthly inspection helps maintain stability and prevents damage. Promptly addressing loose screws extends the hardware’s lifespan.